

Written by Andrew Marshall
UK parent of three sharing practical advice to help families enjoy camping, walking, garden play, and simple outdoor adventures across the UK.
Creator of Simple Days Outside.
Last Updated: 7th April 2026
It was the end of a long Loch Lomond paddle. The kids were done, the board was being deflated, and that’s when I spotted it — a slow hiss from somewhere near the nose. Not dramatic. No visible gash. Just a quiet, steady loss of pressure that explained why the board had felt slightly off for the last twenty minutes.
We made it back fine. But standing in the car park watching it slowly sag, I had that specific sinking feeling of knowing I didn’t have a proper repair kit with me. Not because I’d forgotten it — because I’d never bought one. I’d assumed the little envelope of patches that came in the box with the board was enough.
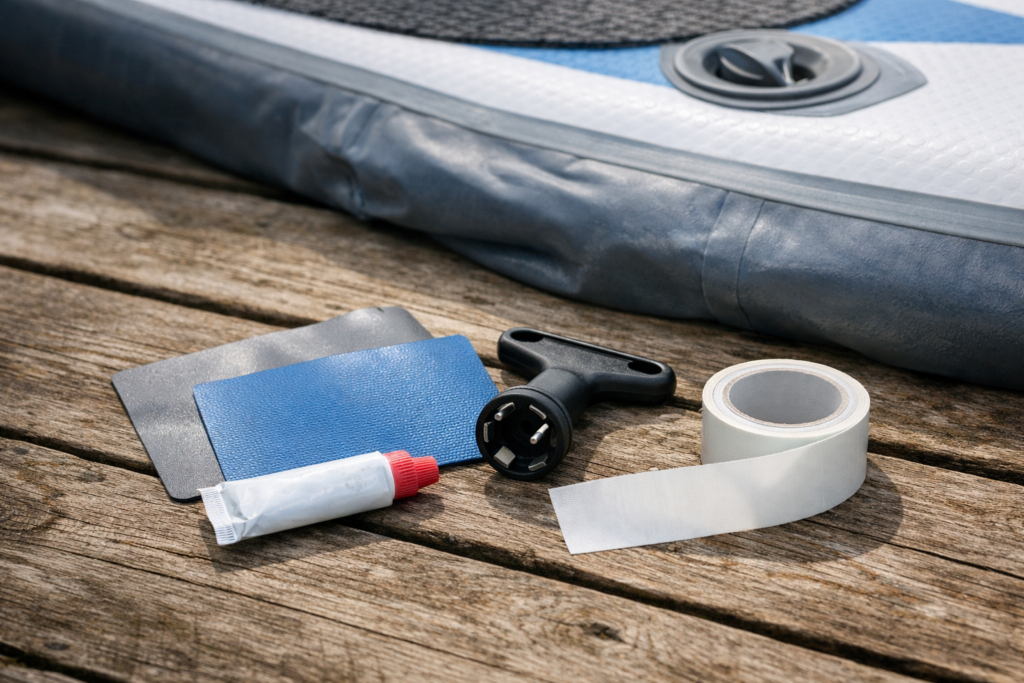
It wasn’t. The glue had dried solid in the tube without ever being opened. The patches were sized for a paddling pool, not a SUP running at 15 PSI. And the valve wrench that came with the kit was the wrong prong count for our board’s valve. Three components, all useless, all sitting in a zip-lock bag I’d never thought to check.
That car park moment is why a proper repair kit now lives in the bag permanently. It weighs almost nothing, takes up almost no space, and has saved two sessions since — one slow seam leak on Loch Tulla caught early enough to patch at home, one valve issue on the Argyll coast that would have ended the day otherwise. This is the shortlist of what’s actually worth buying on Amazon UK, and how to use it properly.
A repair kit is one of those things that should go in the bag before the first session — the same way choosing the right board type affects everything that comes after it.
Before You Buy — What This Article Covers
Everything here is written for inflatable SUPs — the drop-stitch PVC construction used in virtually every family paddle board sold in the UK. Hard epoxy boards are a different situation entirely and need UV-cure resin repair systems rather than PVC patches and contact adhesive. If you’ve got a hard board, this isn’t your article. If you’re on an inflatable, read on.
What Every Proper Repair Kit Actually Needs
The gap between a genuine repair kit and the envelope of patches most boards ship with is bigger than most paddlers realise until they need it.
PVC patches — the right material matters. Inflatable paddle boards are made from drop-stitch PVC. The patches in your kit need to be the same — thick, rugged PVC rated for inflatables running at pressure. Not the thin vinyl patches sold for paddling pools and airbeds. The wrong material doesn’t bond correctly and won’t hold at 12–17 PSI. If the patches feel flimsy or thin between your fingers, they’re not the right patches. The glue is what kills most kits before they’re ever used — dried in the tube, too small a volume to do the job properly, or the wrong formula for PVC-to-PVC bonding. Check the tube before you trust it.
The right glue — and enough of it. PVC bonding requires a proper contact adhesive. Apply to both surfaces, allow to go tacky for around five minutes, press together firmly, and leave to cure for 24 hours before inflation. Most kits include a 5g tube — enough for one or two repairs if used carefully. Keep a spare tube.
A valve wrench — and the right one. Valve leaks are one of the most common inflatable SUP problems. The valve works loose with repeated inflation and deflation and starts letting air escape slowly. A valve wrench lets you tighten or remove it cleanly. The critical detail: there are two configurations — six-prong and eight-prong — and they’re not interchangeable. To check which your board uses, look at the inner collar of the valve when it’s open. Count the prongs on the inner ring. Buy the wrench that matches. Getting this wrong before a session on a remote loch is the kind of frustration that sticks with you.
If you’re not sure what construction your board uses, understanding how inflatable boards are built helps you buy the right kit rather than finding out at the worst moment.
Curing time vs field repair — know the difference. Standard glue-and-patch repairs need 24 hours to cure before the board goes back in the water. That makes them a get-home repair, not an on-water fix. Self-adhesive tape patches are your field repair option — they hold enough to get you back to shore but aren’t a permanent solution. A complete kit covers both scenarios.
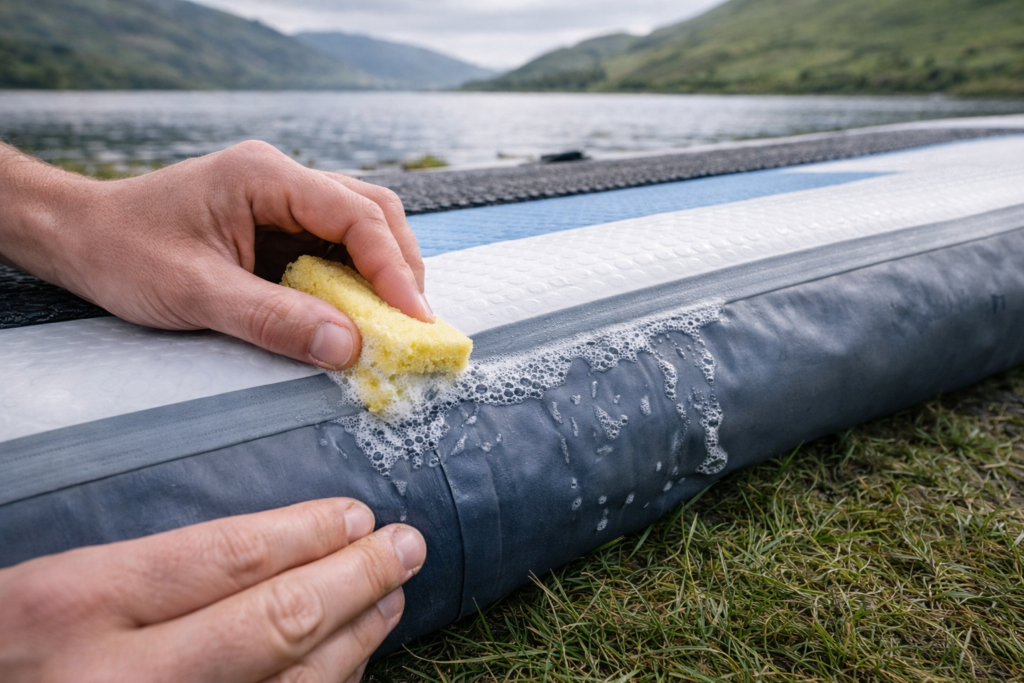
How to Find a Puncture You Can’t See
Slow leaks are often harder to locate than the repair itself. The board loses pressure gradually over an hour rather than going flat immediately, which makes pinpointing the damage genuinely difficult.
The most reliable method: inflate the board fully, mix a small amount of washing-up liquid with water in a cup, and apply it with a sponge or cloth across the deck, rails, seams, and around the valve. Bubbles form exactly where air is escaping. Work methodically from nose to tail rather than randomly — seams and the area around the valve are where leaks start most often on boards that have done a few seasons. Mark the spot with a small piece of tape before deflating so you don’t lose it.
On the water, with no washing-up liquid available, a calm section of loch is your friend. Submerge sections of the board slowly and watch for bubbles rising from the surface. It’s slower and less precise but it works.
The Kits
1. Stormsure SUP Repair Kit — Best Dedicated SUP Kit
You’ve found the puncture. It’s small, on the main deck, and you want a kit built for inflatable SUPs rather than a generic inflatable repair pack that might not hold at board pressure.
Stormsure has been making adhesives for watersports since 1992. Their Flexible Repair Adhesive is what kayakers, kite surfers, and divers have been using for years because it bonds to PVC properly, stays flexible once cured rather than going brittle, and doesn’t fail when the material around it flexes under pressure. This SUP kit is built around that adhesive.
The kit includes two 5g tubes of Stormsure Flexible Repair Adhesive, two circular TUFF tape patches at 75mm diameter, and a TUFF tape strip. The combination of adhesive patches and self-adhesive tape means you have a proper bonded repair option and a faster field option in the same box.
I’ve used the adhesive on a seam split on our board after a particularly rough launch across a rocky Loch Lomond bank — applied both surfaces, waited for tack, pressed hard for a couple of minutes, and left it 24 hours. It’s held through a full subsequent season without lifting at the edges. The adhesive itself smells strongly and needs ventilation — don’t use it in the car or a closed garage.
The honest caveat: this kit has mixed Amazon UK reviews specifically around the patch-only approach. Several buyers note that TUFF tape patches alone — without the adhesive underneath — don’t hold at full SUP pressure. They’re right. The patches are a field fix to get home. The adhesive repair is the permanent fix. Use them in that order, not interchangeably.
Check the glue tube on arrival. If it feels stiff or won’t flow freely, return it. Replace the adhesive tubes annually regardless of use — they go off in storage, especially through cold UK winters.
Best for: Small punctures, seam splits, valve area damage on inflatable SUPs. Worth knowing: TUFF patches alone won’t hold full inflation pressure permanently. Adhesive repair at home is the definitive fix.
2. Dr Boat Heavy Duty Repair Kit — Best for Seam Leaks and Pinhole Damage
The liquid patch does something a surface patch can’t — it gets into the damage rather than sitting on top of it. For seam leaks where the damage is spread across several millimetres rather than a clean puncture, that penetration matters.
With over 1,300 UK reviews and a consistently high rating, the Dr Boat liquid patch repair kit has become the most reviewed inflatable repair option in the UK market. The formula is UV-resistant, works in fresh and salt water, and handles temperature variation — relevant for boards stored in UK garages where freeze-thaw cycles through winter can stress older repairs.
The 40ml volume gives considerably more working material than the small tubes in most patch kits. For a seam repair that needs coverage across several centimetres, volume matters. You want enough adhesive to do the job properly rather than rationing it across a repair that needs generous application.
Opening the Dr Boat for the first time, the consistency is noticeably thicker than standard contact adhesive — it’s closer to a gel than a liquid, which helps it stay in place on a vertical surface rather than running before it bonds. That makes it more forgiving to apply than thinner adhesives, particularly when you’re working alone without someone to hold the board steady.
Where it’s less suited: large tears where a patch and adhesive combination is the right approach. This is a home repair kit, not something to carry on the water. Pair it with TUFF tape in the dry bag for field emergencies and use the Dr Boat for the thorough fix when you’re home.
Best for: Slow seam leaks, pinhole damage, repairs where liquid penetration into the damage works better than surface patching alone. Worth knowing: Home repair kit, not a field fix. Both fresh and salt water conditions covered by the formula.
3. Stormsure Watersports Repair Kit Box — Best for Regular Paddlers With Multiple Kit
You paddle regularly, you’ve got wetsuits, dry bags, and other watersports gear alongside the board, and you want one kit that covers all of it without buying separate kits for each.
The Watersports Box is Stormsure’s broader kit and it’s the one that makes sense for a family that’s accumulated a range of kit over a few seasons. Same Flexible Repair Adhesive as the SUP kit, significantly better patch selection — two 5g tubes of adhesive, a 500mm × 75mm TUFF tape strip, eight 25mm patches, two 75mm patches, disposable gloves, and an alcohol wipe for surface preparation.
That alcohol wipe is the detail most people overlook and shouldn’t. Surface preparation determines whether a repair holds through a season or lifts at the edges after the second session. Grease, sunscreen residue, salt — all of them compromise adhesion. The kit providing a pre-cut wipe means the correct step is right there rather than something you improvise with a wet sleeve.
The 25mm patches cover pinholes. The 75mm patches cover something more significant. The 500mm tape strip gives working length for a seam repair. Having all three formats means you’re not bodging a large repair with patches designed for a small one.
I used this kit — specifically the larger patches and the tape strip — after a kayaker at a shared launch point at Loch Lomond opened a seam on a five-year-old inflatable kayak that looked done. Full adhesion, flexible enough to move with the hull under load, still holding two seasons later. For a paddle boarding family that also has wetsuits, waterproof repair tape, or inflatable kayaks in the mix, the Watersports Box is the one kit that covers all of it.
Best for: Regular paddlers with multiple watersports kit, anyone who wants one kit that goes beyond just the board. Worth knowing: Buy spare Stormsure adhesive tubes separately — the 5g tubes in the kit go quickly on a thorough repair.
4. TUFF Tape Stormsure 0.5m Strip — Best Emergency Field Fix
The other kits are for home repairs done properly with curing time and preparation. This one is for right now, on the water, when you need to get back to shore.
Self-adhesive repair tape is the field fix that most repair kit articles gloss over. TUFF Tape bonds to PVC without glue, primer, or curing time — peel, press, done. A 0.5m strip sits flat in the bottom of whatever dry bag you’re using and you forget it’s there until you need it.
It won’t hold full SUP operating pressure as a permanent repair. But it holds enough to deflate the board safely and paddle back to shore without the situation getting worse — and on a remote Scottish loch or a sea session where you’re a meaningful distance from the launch point, that is exactly what you need it to do.
First time I used it was on a slow rail leak spotted mid-session on Loch Tulla. Paddled to the nearest bank, dried the area as well as possible with a dry layer from the bag, pressed the tape down hard for thirty seconds, and got back on. The board held pressure long enough to finish the paddle back and get home. Not glamorous. Completely effective for its purpose.
It also works on wetsuits, dry bags, tent fabric, and waterproof jacket seams. One strip in the bag covers a range of field repairs across everything you’ve got with you — which on a family day where kit gets used hard across different conditions is more useful than a repair option that only works on one thing.
Apply to as dry a surface as possible — the bond is significantly stronger on a dried area than a wet one. A quick pass with the inside of a dry layer achieves this well enough for a field repair.
Best for: On-water emergency repairs, dry bag carry, multi-material field repairs. Worth knowing: Not a permanent repair under full inflation pressure. Get home, then do the proper fix.

5. Stormsure Flexible Repair Adhesive 15g — Best if You Already Have Patches
The kit that came with your board included patches. The glue dried solid before you ever opened it. This is the replacement.
The standalone SUP repair adhesive 15g tube gives considerably more working volume than the 5g tubes included in most kits — enough for three or four proper repairs done correctly rather than rationing a small tube across one job. If your patches are fine and the glue is the only component that needs replacing, this is significantly better value than buying a full kit again.
The consistency matters in practice. Fresh Stormsure adhesive at room temperature is thick enough to stay where you put it but fluid enough to spread evenly with a small brush or the tube tip. In cold conditions — a Scottish garage in March — it thickens noticeably and benefits from warming the tube in your hands for a minute before application. Don’t rush the application in cold weather. Cold adhesive applied unevenly is how you get a repair that looks solid and isn’t.
Apply to both surfaces. Allow to go properly tacky — five minutes minimum, longer in cold conditions. Press together firmly and apply pressure across the whole patch area rather than just the centre. Leave 24 hours before inflation. That sequence sounds obvious written out but skipping any step is how repairs fail.
The 3-pack of 5g tubes is worth considering as an alternative — sealed individual tubes stay fresh longer than an open 15g tube, particularly if you’re only doing occasional repairs. Pick whichever format suits how often you’re likely to use it.
Best for: Replacing dried-out kit glue, paddlers with existing patches, higher-volume repairs done at home. Worth knowing: Warm the tube in cold conditions before use. Cure time is 24 hours — don’t cut it short.
What to Carry on the Water vs Keep at Home
This is the question most repair kit articles don’t answer directly and it’s the most practically useful thing to get right.
In the dry bag on the water: a TUFF Tape strip and two self-adhesive PVC repair patches. That’s it. Field repair kit doesn’t need to be comprehensive — it needs to get you back to shore safely. A proper glue-and-patch repair can’t be done on the water in conditions where it will cure correctly anyway. Carry what works in the moment.
At home in the kit bag: Stormsure Watersports Box or the SUP Kit, spare adhesive tubes, and the Dr Boat liquid patch for seam damage. This is your proper repair setup for when the board is home, deflated, and you have time to do the job right.
The full breakdown of what to pack — including repair kit, safety kit, and everything else — is in the complete family paddle boarding kit list.
Check Your Kit Every Season — Not Every Time You Need It
Glue goes off. Sealed tubes in a cold garage through a Scottish winter thicken and eventually cure in the tube. Patches go brittle. The valve wrench that matched your old board might not match the new one.
At the start of every season — April, before the first session — spend five minutes with the kit. Squeeze the adhesive tube and check it flows freely. Bend a patch and check it’s still pliable. Confirm the valve wrench matches the board’s valve configuration. If anything has degraded, replace it before the season starts rather than in a car park in July.
Replace adhesive tubes every two seasons regardless of whether they’ve been opened. The cost is negligible. The alternative is standing at a launch point with a kit that looks fine and isn’t.
Related Guides
About The Author – Andrew Marshall
Andrew Marshall is the creator of Simple Days Outside and a UK parent of three who regularly camps, walks, and explores outdoor activities with his family. His guides focus on practical gear, realistic family adventures, and simple ways to help families enjoy the outdoors across the UK. The recommendations on this site are based on real-world use, research, and the kind of equipment families actually rely on for weekend trips and everyday outdoor fun.